Zu erst zerlegt bitte Vorsichtig eure Standard teilweise, am besten nehmt ihr den Rotor ab und demontiert auch alle Bügelteile, unbedingt beachten das Schnurlaufröllchen hat eine Senkschraube mit Linksgewinde! Und bitte verwendet immer einen passenden Schraubendreher, die Schrauben werden es Euch danken!
Wer kein handwerkliches Geschick oder entsprechendes Werkzeug hat, sollte diese Arbeiten lieber von jemanden anderen durchführen lassen!
First, carefully disassemble your reel ideally, remove the rotor and take off all the bail components. Please note that the line roller is secured by a countersunk screw with a left-hand thread! Also, always use a properly fitting screwdriver, the screws will thank you for it!
If you lack manual skill or the proper tools, it is better to have someone else carry out this work!
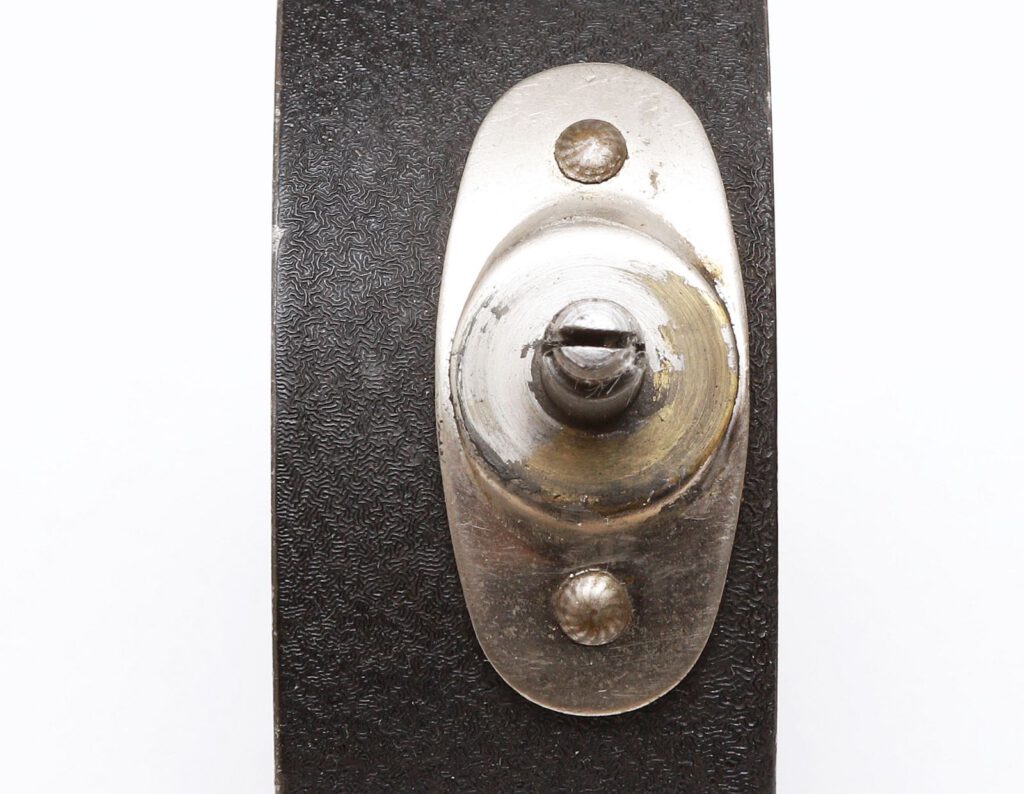
Als erstes nehmt ihr Euch den Rotor vor. Erstmal wird er gründlich mit Seifenlauge und einer Wurzelbürste geschruppt. Denn meist hängen an verstecken Stellen noch Schmutz und Sandkörner usw.. Dann reinigt ihr die Bügelaufnahme gründlich vom verharztem Fett und Schmutz, meist sehen sie so aus wie dieser hier, oder noch schlimmer! Dann nehmt ihr Euch eine Feder und versucht, ob diese leicht gängig in den Schlitz rein und raus geht! Häufig ist der Schlitz verdreckt oder sogar verdrückt. Sollte er tatsächlich zu eng für eure Feder sein? Auf keinen Fall aufbiegen, dann bricht meistens ein Teil des Bolzens ab und ihr müsst eine große Instandsetzung durchführen! Ist der Spalt zu klein, den Schlitz vorsichtig mit einer Puksäge oder einer Schlüsselfeile ganz vorsichtig auffeilen, bis die Feder leichtgängig rein und raus geht. Das ist sehr wichtig sonst verformt sich die Feder und der Bügel arbeitet nicht einwandfrei! Außerdem muss der Schlitz 90Grad zum Rotor stehen, sollte das nicht der Fall sein, den Schlitz vorsichtig auf 90Grad verdrehen, sonst stimmt die Federvorspannung nicht! Außerdem müsst ihr testen, ob sich der Bolzen nicht zu leicht verdrehen lässt, dann würde die Federspannung nach kurzer Zeit nachlassen, weil sich der Bolzen verdreht! Dann vorsichtig den Bolzen mit einem Körner etwas von unten her festsetzen!
Start by addressing the rotor. First, scrub it thoroughly using soapy water and a stiff-bristled brush, as dirt, sand, and other debris often accumulate in hidden areas. Next, clean the bail attachment point, removing any hardened, gummy grease and grime, it will likely look similar to the one shown here, if not worse! Then, take a spring and check whether it slides in and out of the slot smoothly. The slot is frequently clogged with dirt or may even be slightly crushed. If it happens to be too narrow for the spring, do not—under any circumstances—try to pry it open, doing so will almost certainly cause a piece of the stud to break off, necessitating a major repair! If the gap is too small, carefully widen the slot using a hacksaw blade or a small needle file until the spring can move in and out freely. This is crucial, otherwise, the spring will become deformed, and the bail will not function correctly. Furthermore, the slot must be positioned at a 90-degree angle to the rotor, if it is not, carefully adjust it to 90 degrees, as the spring preload will otherwise be incorrect. You must also ensure that the stud does not rotate too easily, if it does, the stud could shift during use, causing the spring tension to diminish over time. To prevent this, carefully secure the stud in place by lightly tapping it from underneath with a center punch.
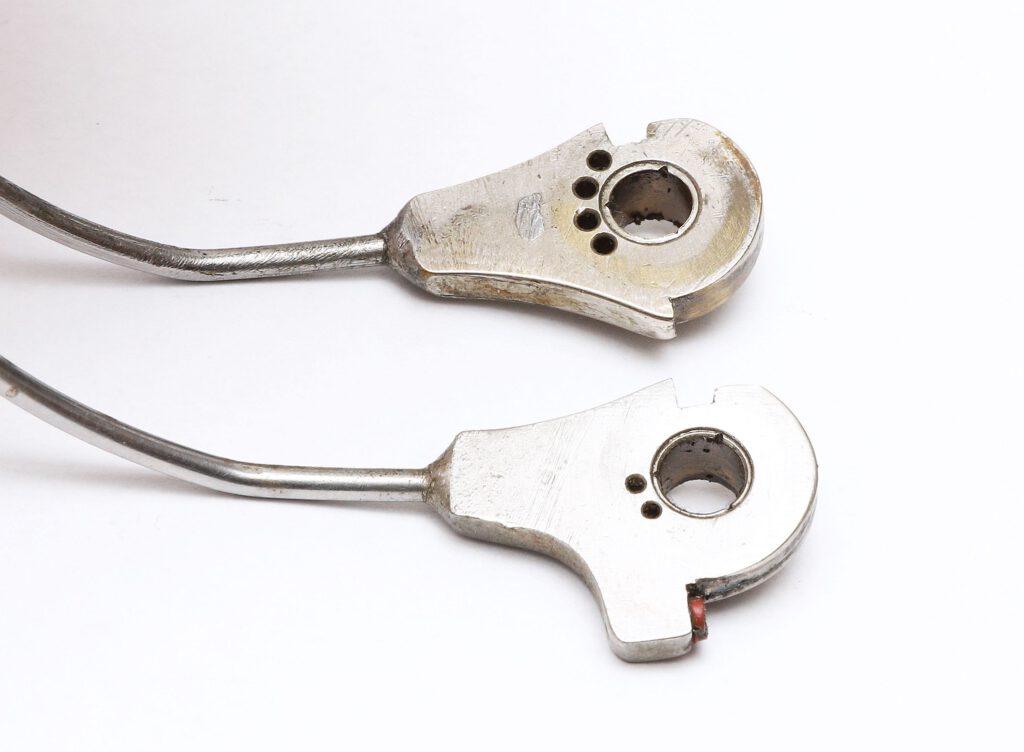
Es gibt verschiedene Bügellager. Der beste ist die letzte Version mit integriertem Dämpfergummi, falls bei Euch ein anderer verbaut ist, besorgt Euch einen solchen, siehe unten! Den Bügel ebenfalls mit Seifenlauge und Wurzelbürste gut schruppen. Als erstes die Lötverbindung, zwischen Bügel und Bügelscharnier auf festen Sitz kontrollieren, sollte er locker sein, einfach weich nach löten. Dann falls noch vorhanden, den Dämpfergummi gegen ein neuen austauschen. Wer keinen passenden hat, einfach einen passenden O-Ring im Baumarkt kaufen, auf die richtige Länge schneiden und mit etwas Sekundenkleber sichern. So jetzt ist der Bügel auch vorbereitet.
Die verschiedenen kleinen Bohrungen dienen dazu, verschiedenen starke Feder Vorspannungen zu erzeugen, wenn dies Notwendig sein sollte. Je niedriger die Vorspannung je länger hält die Feder! Aber der Bügel muss halt auch, voll umklappen!
There are various types of mounts for the headband. The best version is the latest one, which features an integrated rubber damper, if yours is a different type, you should acquire this version, see below! Also, scrub the headband thoroughly using soapy water and a stiff-bristled brush. First, check the soldered connection between the headband and its hinge to ensure it is secure, if it feels loose, simply resolder it. Next, if a rubber damper is still present, replace it with a new one. If you don’t have a suitable replacement, you can simply buy an O-ring from a hardware store, cut it to the correct length, and secure it in place with a drop of superglue. With that, the headband is now prepared.
The various small holes are used to create different levels of spring preload, should that be necessary. The lower the preload, the longer the spring will last! However, the bracket must still be able to fold over completely.
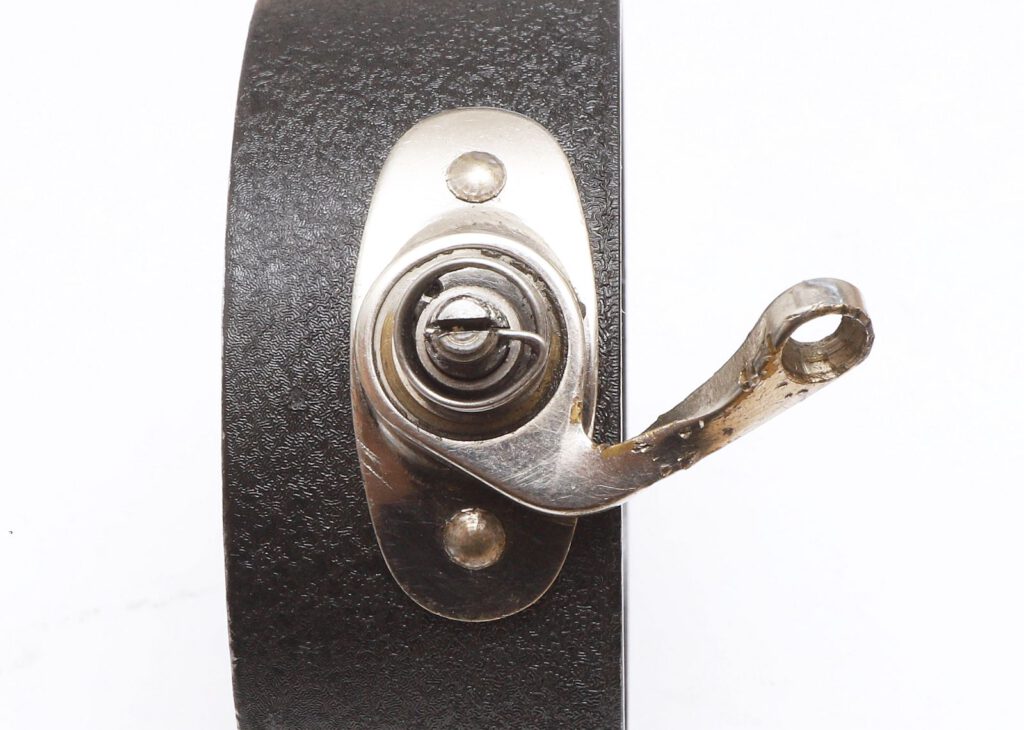
Da es 2 verschiedene Bügelfedern gibt, ja nach Seite. Hier ein Foto zur richtigen Montage der richtigen Feder. Interessant ist noch dieses Bügelscharnier, man kann deutlich sehen, das hier jemand versucht hat, die Schnurlaufröllchen Schraube auf zu meißeln! Wahrscheinlich wusste er nicht, das es sich um eine Senkschraube, mit Linksgewinde gehandelt hat?
Since there are two different bail springs, one for each side, here is a photo showing the correct installation of the appropriate spring. Also of note is this bail hinge, you can clearly see that someone tried to chisel open the screw for the line roller! They likely didn’t realize that it was a countersunk screw with a left-hand thread.
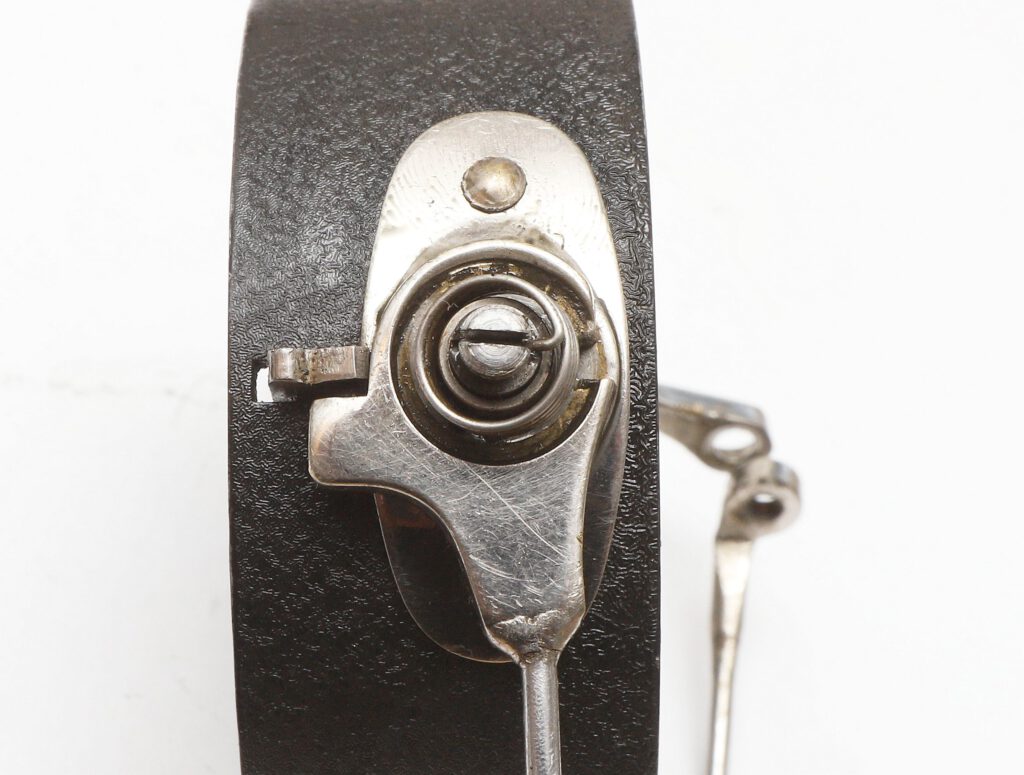
So hier jetzt die richtige Montage, der Feder für die andere Seite.
So, here is the correct way to install the spring for the other side.
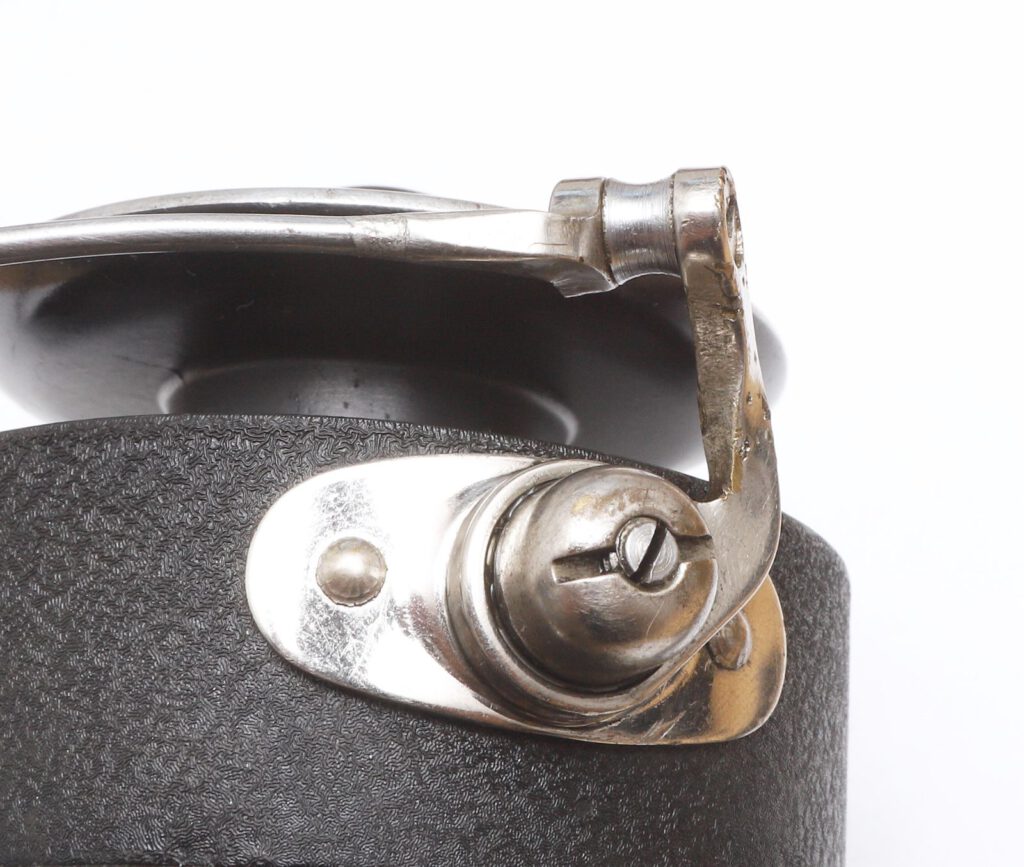
So jetzt etwas sehr wichtiges! Ihr müsst den langen Bügel, mit dem Draht, unbedingt so biegen, das er mit dem anderen Scharnier gut fluchtet (wo die Senkschraube rein kommt)! Immer wieder ausrichten und kontrollieren, ob die Flucht und der Abstand stimmt! Sonst klemmt später der Bügel, wenn ihr die Schnurlaufröllchen Schraube anzieht. Aber ganz wichtig, keine großen Kräfte auf das gegen überliegende Scharnier einwirken lassen, sonst ist der Bügel in der Weichlot Verbindung anschließend locker, immer Gegenhalten beim biegen!
Now, here is something very important! You must bend the long wire bail so that it aligns perfectly with the opposite hinge (where the countersunk screw goes). Keep adjusting and checking to ensure the alignment and spacing are correct! Otherwise, the bail will bind once you tighten the screw for the line roller. Most importantly, do not apply excessive force to the opposite hinge, doing so could loosen the soft-soldered joint. Always provide counter-support while bending!
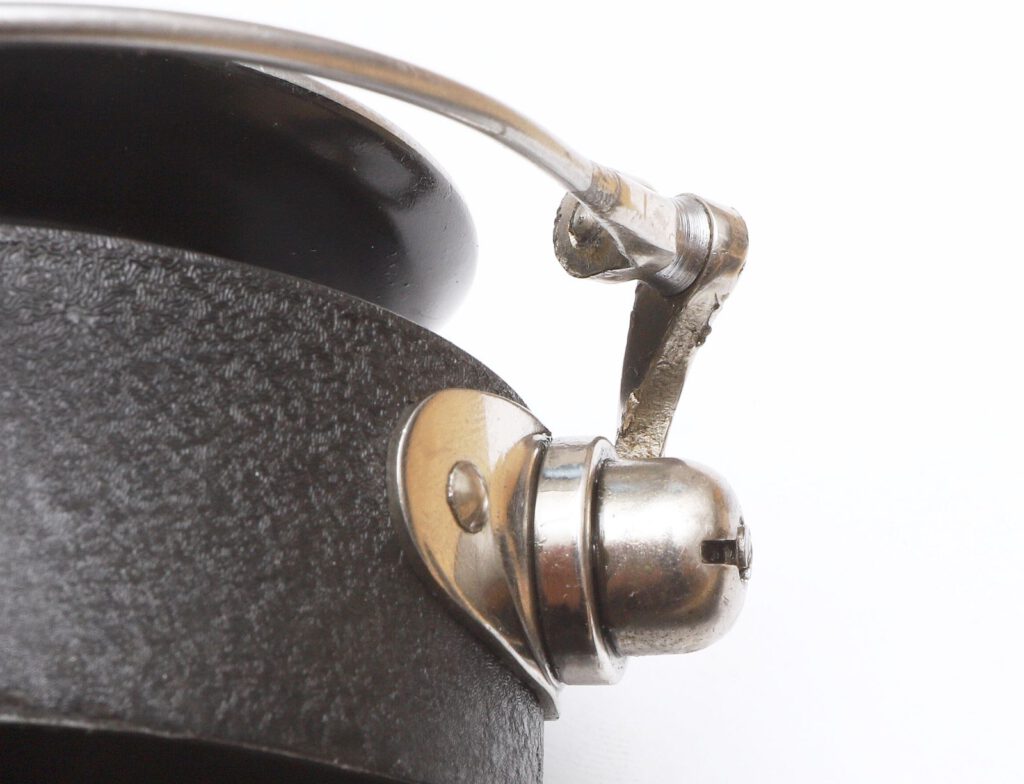
Ihr müsst die Federabdeckkappe, möglicher weise mit der Feile leicht auf Länge anpassen, da ja alle Teile Toleranzen haben. Wenn ihr die Kappe aufschraubt, muss der Bügel anschließent leicht von der Feder geschlossen werden. Überprüft das bitte mehrmals und vergesst das schmieren mit dünn flüssigen Öl vorher nicht. Sollte das nicht der Fall sein siehe nächstes Foto!
You may need to adjust the length of the spring cover cap, possibly using a file, since all parts are subject to manufacturing tolerances. Once the cap is screwed on, the clip should be easily closed by the spring. Please check this several times, and don’t forget to apply some thin-bodied oil beforehand. If this is not the case, see the next photo!
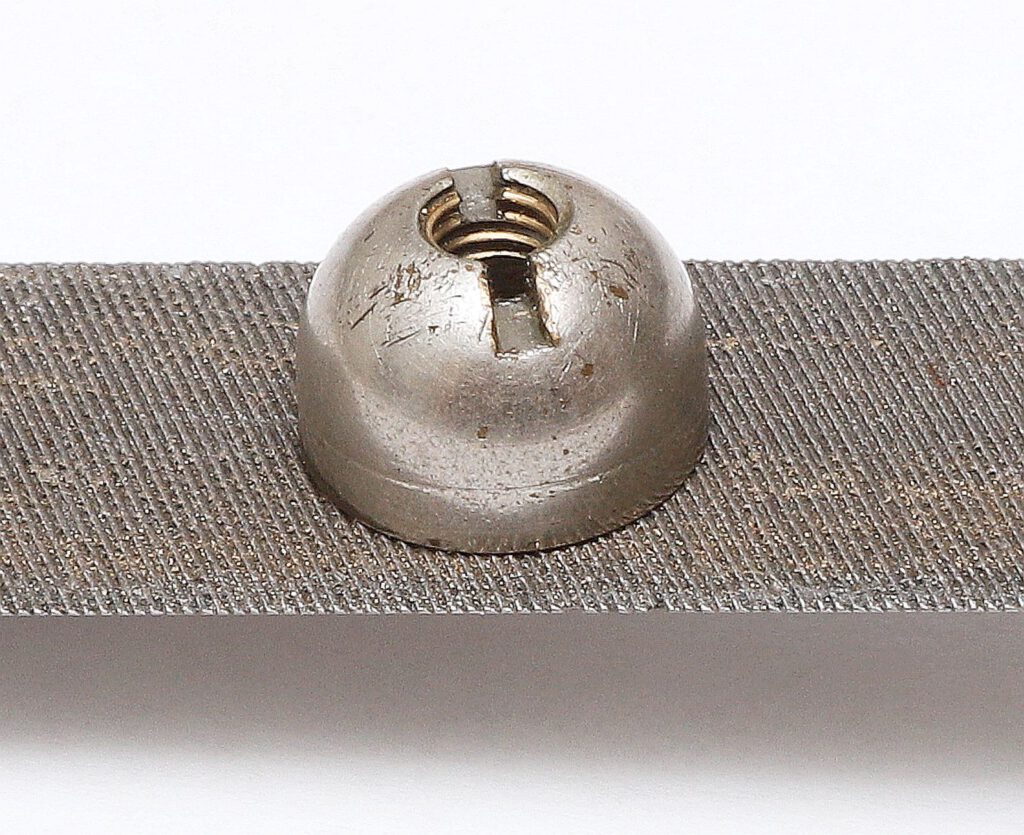
Sollte das Scharnier zu schwer gehen, dann vorsichtig ein paar Zehntel Milimeter abfeilen, dann wieder die Kappe montieren und funktion testen. Natürlich muss die Kappe vor dem montieren, Innen und Außen entgratet werden und neu geschmiert werden. Nicht zuviel abfeilen, sonst kann das Scharnier anschließend verkanten, oder die Feder springt ab und wird verformt!
If the hinge is too stiff, carefully file off a few tenths of a millimeter, then reattach the cap and test its operation. Naturally, the cap must be deburred on both the inside and outside before reassembly, and it should be lubricated again. Do not file off too much material; otherwise, the hinge could jam, or the spring might pop out of place and become deformed!
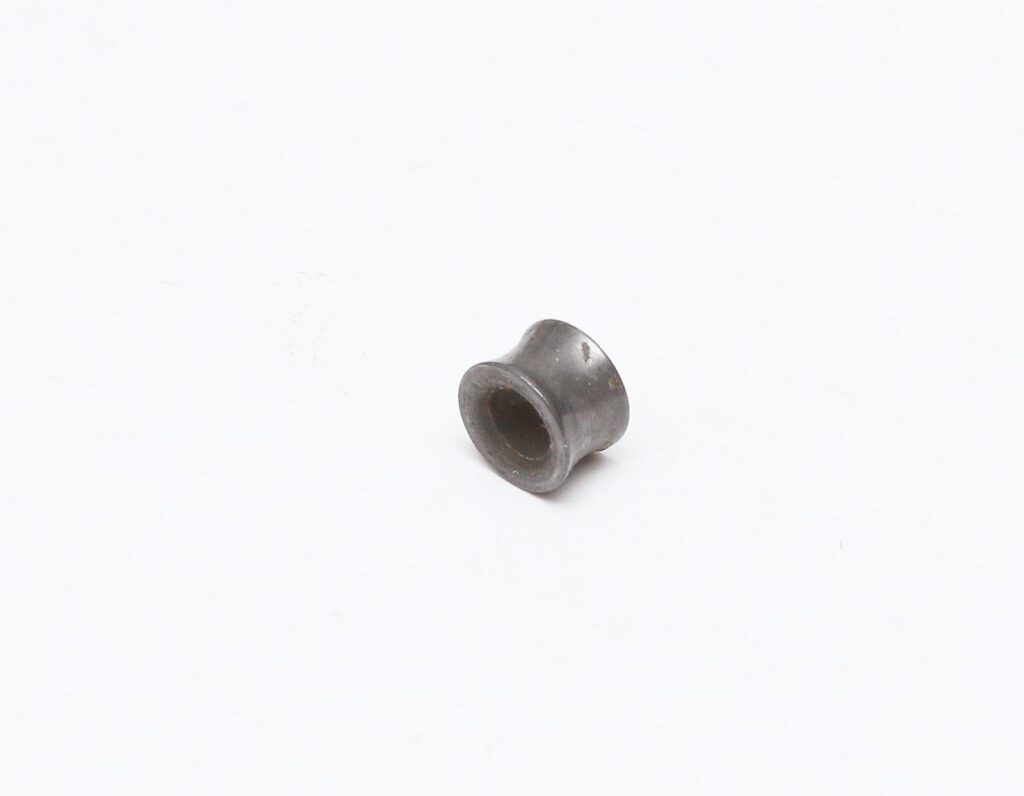
Und jetzt noch ein kleiner Trick zum Schluss! Verwendet ein Schnurlaufröllchen von den Finessa Modellen! Diese sind aus Hartmetall gemacht und haben keinen Verschleiß! Man erkennt sie leicht an der etwas bläulichen Farbe und den etwas größeren Radien!
And one final little trick! Use a line roller from the Finessa models! These are made of hard metal and are completely wear-resistant! You can easily identify them by their slightly bluish color and somewhat larger radius!
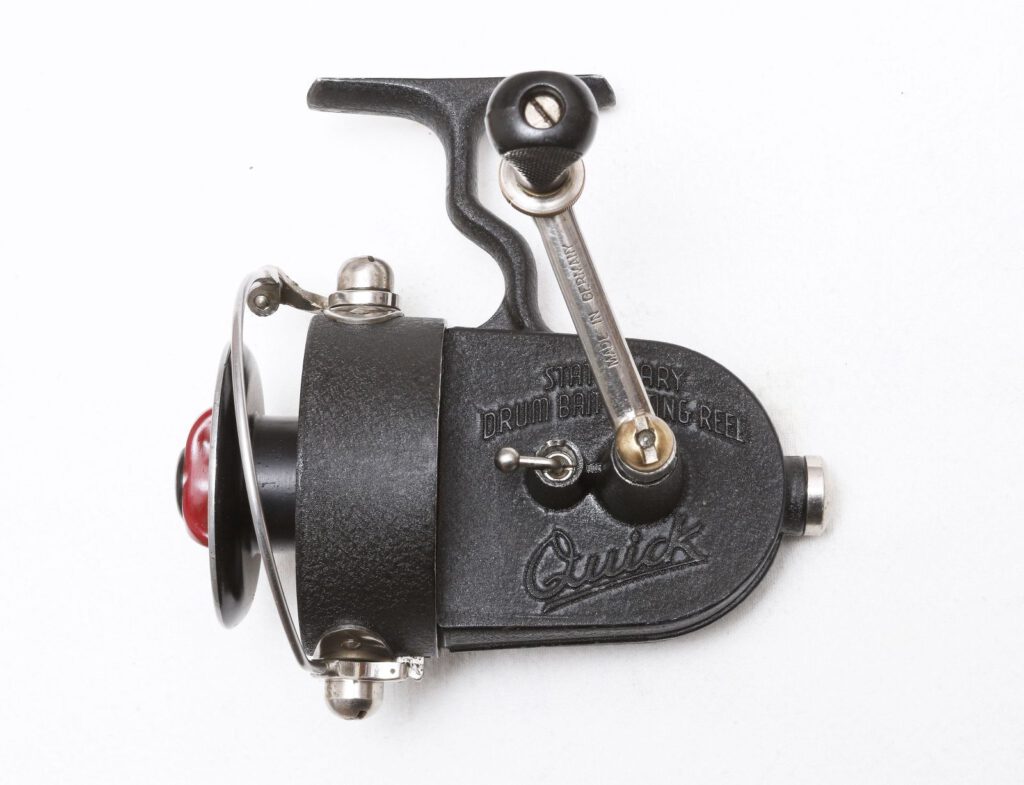
Jetzt schnurt die Rolle wieder genau wie vor 70 Jahren, denn diese Rolle ist Baujahr 1956!
Now the reel purrs again, just as it did 70 years ago, this reel is built in 1956!
Schreibe einen Kommentar